Screenshot Not Working on Mac: Find Your Symptom, Then Fix It
If screenshots suddenly stop working on your Mac, the problem isn’t always obvious. Maybe ⇧⌘4 does nothing, the shutter sounds but the screenshot never appears on your Desktop, or the saved image is black or grey.

On this page
These look like one problem, but they have different causes, and most of the recent reports started with a macOS update. The quickest way to fix yours is to start with what you actually see on screen, rather than trying every troubleshooting tip you find.
First, check the Screenshot settings below. Then jump to the section that matches your problem. If you need a refresher on the shortcuts, our guide on how to take a screenshot on a Mac covers them.
Start by Checking Your Screenshot Settings
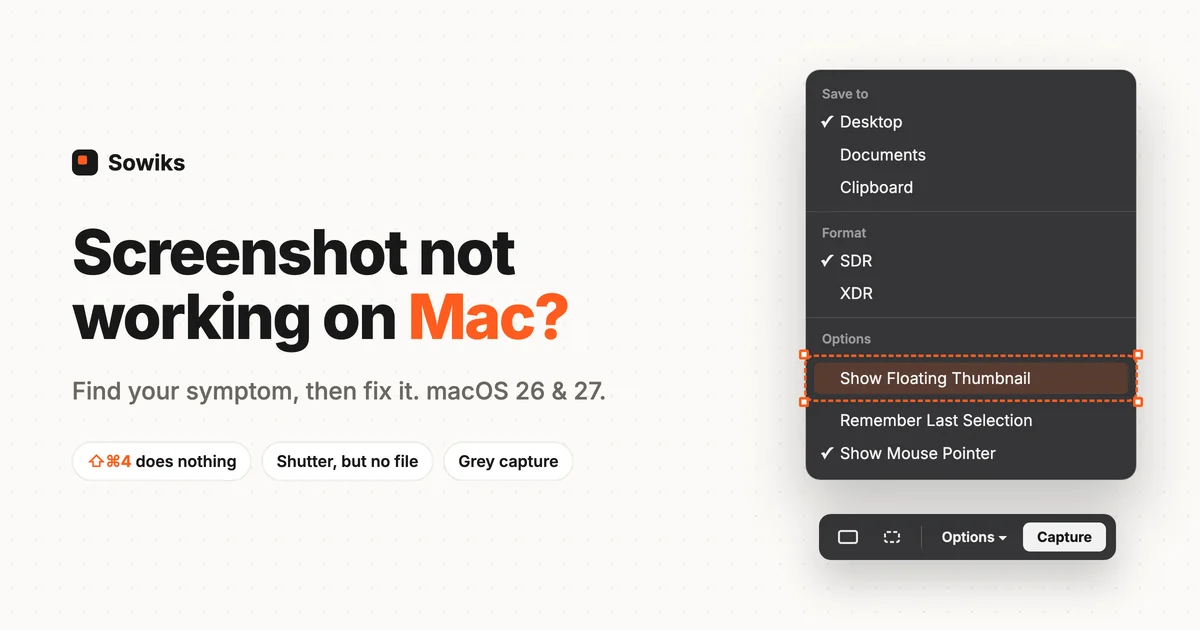
Press ⇧⌘5 to open the built-in Screenshot toolbar, then click Options. This is where you choose where screenshots are saved and whether a floating preview appears after each capture, and the cause is often right there.
Start with Save to. If it points to a folder you no longer use or don’t recognize, choose Other Location, then Desktop. If Desktop doesn’t show in that column, pick your home folder first and Desktop inside it. Take a test screenshot to see whether it appears there.
Also check these two things:
- Show Floating Thumbnail. While it’s on, the file isn’t written until the thumbnail goes away. If screenshots seem to disappear after the small preview appears, turn this option off and take another screenshot. More on that below.
- The Control key. Pressing ⌃⇧⌘4 copies the selected area to the clipboard instead of saving a file. If you’ve been holding Control out of habit, there is no file to find. Use ⇧⌘4 without Control when you want a screenshot file.
If screenshots still aren’t working, the next step is to find out whether the issue affects the screenshot tool itself or just the keyboard shortcut.
Check Whether the Screenshot Tool Works Without Shortcuts
Open Preview → File → Take Screenshot and try capturing part of your screen. You can also open the Screenshot app from Applications → Utilities and click Capture in its toolbar.
If these methods work but ⇧⌘4 doesn’t, focus on your keyboard shortcut settings or an app that might be using the same keys.
For another check, open Terminal and run:
screencapture -x ~/Desktop/test.pngIf test.png appears on your Desktop, your Mac can still take screenshots. What’s broken is the path between the shortcut and the saved file: a setting, the thumbnail or the folder. That’s good news, because every fix for that is a setting.
To see what macOS thinks your settings are, run:
defaults read com.apple.screencaptureOn macOS 27 this prints separate keys for screenshots and recordings: location-screenshot and location-screenrecording next to the older location, plus show-thumbnail, target-screenshot and captureDelay. On a Mac that saves normally, target-screenshot reads file; anything else means captures aren’t going to a file at all. If there’s no type key, you’re on the default format. Older versions of macOS print fewer keys, so don’t change unfamiliar settings just because a guide shows a different value.
Nothing Happens When You Press the Shortcut
If ⇧⌘4 doesn’t bring up the crosshair at all, no sound, nothing, the shortcut itself is almost always the culprit.
Go to System Settings → Keyboard → Keyboard Shortcuts → Screenshots. Every line should be checked. If any combination looks unfamiliar, or you’ve changed them and can’t remember what they were, click Restore Defaults.
Still nothing? Another app probably claims the same combination. macOS doesn’t stop this: any app can register ⇧⌘4 as its own global shortcut without an error, and the system won’t warn you. Screenshot tools are the usual suspects. Skitch, Lightshot, Snagit, CleanShot X and older versions of Dropbox have all been known to claim the screenshot keys.
Quit any screenshot or keyboard-customization apps you have running, one at a time, and test ⇧⌘4 after each one. If the shortcut starts working again, change that app’s shortcut settings before reopening it.
You Get a One-Pixel Line Instead of a Selection
Sometimes ⇧⌘4 starts normally, but dragging creates a sliver one pixel wide instead of a rectangular screenshot. It happens far more often on a trackpad than with a mouse, and most often with Control held down for a clipboard capture. On some Macs, every click afterwards opens the Finder until you take a full-screen shot with ⇧⌘3.
Change the order of the keys:
- Press ⇧⌘4 without Control.
- Drag to select the area you want.
- If you need the image on your clipboard, press and hold ⌃ only while you let go of the click.
If the line appears anyway, tap ⇧ once: the box redraws from where the pointer is. To capture a single window without dragging, press ⇧⌘4, then Space, and click the window. You can also use ⇧⌘5 and make the selection from the Screenshot toolbar.
The Shutter Sounds, but No File Appears
Your Mac seems to take the screenshot, but the file is nowhere: not on the Desktop, not in Recents, not in Spotlight. This is the symptom that spread with macOS 26 Tahoe.
Before resetting anything, work through the thumbnail, format and save-location checks below.
Check the Floating Thumbnail
The fix most people landed on is the strangest one:
- Press ⇧⌘5.
- Open Options.
- Uncheck Show Floating Thumbnail.
- Take another screenshot and look in the location shown under Save to.
On macOS 26 that alone brought screenshots back for many users, who mostly admitted they had no idea why it worked.
Here’s the likely reason. With the thumbnail on, macOS doesn’t save the file right away. The picture stays in the lower right corner for 3 to 5 seconds, and only then is it saved. With the thumbnail off, macOS saves new screenshots straight to the Desktop. Several users reported that the file got lost exactly when they touched or dragged the thumbnail during those seconds.
Turning it off has a cost: the automatic handoff to iPhone or iPad for markup is no longer offered. If you like the thumbnail, you don’t have to leave it disabled. You can make it save at once instead of waiting:
- Swipe: push the thumbnail off the screen to the right with a mouse or trackpad, and it lands immediately as a file on the Desktop.
- Drag: grab the thumbnail, pull it 30 pixels toward the middle of the screen and let go.
- Right-click it for a menu of quick actions, including saving.
Check Remember Last Selection
Open ⇧⌘5 → Options and look for Remember Last Selection. After the update to Tahoe, some users found it switched on, and with it screenshots stopped saving. Turning it off fixed it for them.
It’s not a universal fix, but it’s easy to test: turn the option off, make a new selection, and see whether the screenshot saves normally.
Check the Screenshot File Format
Since macOS 26, the system on some Macs offers to switch screenshots to an HDR format. Accept, and every screenshot after that is saved as HEIC instead of the PNG you’re expecting. HEIC keeps 10 bits per colour channel instead of 8, which looks great on an XDR display. The drawback is that quite a lot of websites and apps can’t handle it and ask for a conventional JPEG or PNG. In the Options menu you can switch between SDR and XDR. If a screenshot exists but won’t open or upload, check its actual extension before assuming the capture failed.
PDF is the other trap. Users who had set PDF as their default format found it simply stopped working after the update: in Tahoe, PDF and the floating thumbnail don’t get along. Either turn the thumbnail off, or go back to PNG. Open Terminal and run:
defaults write com.apple.screencapture type png
killall SystemUIServer
Take another screenshot to test the change. If you’d rather use JPEG or HEIC, set jpg or heic instead. To remove your custom format preference and return to the system default, run:
defaults delete com.apple.screencapture typeIf that command says the setting doesn’t exist, there is no custom format preference to remove, and you don’t need to change anything else. Some users kept PDF working by changing the format with a utility such as OnyX, so the conflict isn’t universal. If you depend on PDF, test it once after every update.
Check the Save Folder and Sync Apps
A screenshot can be captured successfully and still end up somewhere you weren’t expecting.
First, open ⇧⌘5 → Options → Save to and check the selected folder. Then look in Finder → Recents, or search the whole disk for “Screenshot” with Spotlight or a tool such as Find Any File.
Sync apps can take screenshots for themselves. OneDrive, Google Drive, Backblaze and Dropbox all have settings for this, so if one of them is installed, look through its preferences and recently synced files first.
iCloud Drive is quieter about it. If you sync Desktop & Documents with iCloud, you have a Desktop in two places, and the Save to menu may show Desktop twice. After an update, screenshots can sit in iCloud for a while before they show up locally.
Sometimes the file is saved and the Finder simply doesn’t show it. A Finder window that’s already open doesn’t always refresh, so try opening a new window on the same folder. If that doesn’t help, hold ⌥, right-click the Finder icon in the Dock, and choose Relaunch. If you have to do that after every screenshot, move ~/Library/Preferences/com.apple.finder.plist to your Desktop and relaunch the Finder: it starts with fresh preferences, and the files show up again.
Reset the Screenshot Preferences
If you’ve checked the shortcuts, format and save location without success, reset the saved Screenshot preferences. They live in this file:
~/Library/Preferences/com.apple.screencapture.plistDon’t delete it. Move it to your Desktop as a backup, then restart your Mac. macOS creates a fresh one with default settings, and you’ll need to choose your screenshot options again afterward. Apple support has given users the same advice, and it fixed the problem for them. If you’d rather not touch the Library folder, a maintenance app such as Cocktail can reset the same preferences.
Another test before touching files: log in to another macOS user account. If screenshots work there, the problem lives in your account’s settings or apps, not in macOS.
“Your Screenshot Can’t Be Saved”
This one, at least, tells you something. The usual version says you don’t have permission to save in the location where screenshots are stored, and it often appears for an administrator, which makes it extra confusing.
The cause is usually the folder, not your rights. The original save location may have been moved, deleted or become unavailable, and macOS is still trying to write there. Press ⇧⌘5, open Options, choose Desktop under Save to, and try again. If it works, you can then choose a different folder you have permission to write to.
A rarer variant says “Your screenshot can’t be saved. Unable to capture desktop image.” On macOS 26.2 it came with the pointer and keyboard freezing until Esc was pressed. In that case System Integrity Protection (SIP) had been turned off, and turning it back on fixed screenshots. Check yours in Terminal:
csrutil statusA Mac with SIP on answers System Integrity Protection status: enabled. If yours says disabled, find out why before you change it: SIP may have been turned off on purpose, for development work or by an administrator. Turning it back on happens in macOS Recovery, and on a work Mac that’s a question for IT.
The File Is There, but It’s Black or Grey
If the screenshot saves but the image is black or grey, first check what you were trying to capture.
Protected video comes out blank on purpose. Streaming services use digital rights management (DRM), so a music video in Apple Music, a film in the Apple TV app or another protected stream turns into grey areas in a screenshot. Apple Music goes further: it detects that a recording program is running in the background and prevents the video from playing in the first place. No setting changes this, and changing the screenshot format or save folder won’t help.
If ordinary apps or desktop windows also come out black, look at these possibilities:
- A managed work Mac. An administrator can switch off screenshots and screen recording entirely with a device management restriction, available since macOS 10.14.4. It’s a company policy, and only IT can lift it.
- A third-party app without permission. A screenshot or recording app captures black until you allow it under System Settings → Privacy & Security → Screen & System Audio Recording. After granting access, quit and reopen the app before testing again. Our screen recording guide covers the same permission.
Try a screenshot with the built-in macOS tool as well. If it works there but not in a third-party app, focus on that app’s permissions and settings.
Fixes That Probably Won’t Help
You may see recommendations to reset NVRAM, scan for malware or free up disk space. Those steps can be useful for other Mac problems, but they don’t fit this one. Screenshot settings live in com.apple.screencapture.plist, not in NVRAM, so resetting NVRAM leaves them exactly as they were. And unless your drive is genuinely full, disk space isn’t why one shortcut stopped saving files.
A normal restart is worth trying once, especially after a macOS update. Reinstalling macOS is a last resort, after you’ve ruled out account-specific settings and backed up your data.
Alternative Ways to Take Screenshots on Mac
You don’t have to stop working while you sort this out. The built-in Screenshot app under Applications → Utilities lets you capture from the toolbar and set how and where screenshots are saved. Preview → File → Take Screenshot works even when the shortcuts don’t, if a bit more slowly.
A dedicated screenshot app is another option, because it captures in its own way rather than through the system path. Shottr is a common pick for this. Sowiks, a Mac screenshot app, captures through Apple’s ScreenCaptureKit, so it bypasses the floating thumbnail and the com.apple.screencapture preferences that break after updates. Like any third-party capture app, it needs Screen Recording permission. Its default shortcuts, ⌥⌘A for an area and ⌥⌘X for the full screen, leave ⇧⌘3, ⇧⌘4 and ⇧⌘5 to macOS. Its editor is free.
For more choices, see our roundup of the best screenshot apps for Mac.
FAQ
Why doesn't a preview pop up after I take a screenshot?
The Show Floating Thumbnail option is off. Press Shift-Command-5, open Options, and enable it if you want the preview back. Leaving it off is fine: files are then saved immediately. If it keeps switching itself off, another app is changing the setting. A browser update has done exactly that, turning the thumbnail off again every time the browser launched. Quit recently updated apps and check the setting again.
Why does Command-Shift-4 open Preview instead of saving?
Your Save to destination is set to Preview. Press Shift-Command-5, open Options, and choose Desktop or another folder under Save to.
How do I make Command-Shift-4 copy to the clipboard?
Press Shift-Control-Command-4 and select an area. The screenshot goes to your clipboard instead of being saved as a file, ready to paste into a document, message or image editor.
Why did my screenshots stop saving after a macOS update?
On macOS 26 the most common causes were the floating thumbnail, a PDF or HEIC format, and Remember Last Selection being switched on. Check all three in Shift-Command-5 → Options before anything else, then check whether a third-party app is interfering with your shortcuts.
Can I keep the thumbnail and still save instantly?
Yes. Swipe the thumbnail to the right and the file is saved at once. Or press Shift-Command-4 so the pointer turns into a crosshair, then press Shift-Command-3 instead of selecting an area: the full-screen screenshot is saved directly to the Desktop, without the preview delay.
Vasyl is a Product Marketing Manager at MySignature with experience in SEO and Growth. He has been featured on HubSpot, The Next Web, ActiveCampaign, and other well-known marketing blogs.
Screenshots that don’t depend on the system shortcut
Sowiks captures through ScreenCaptureKit with its own shortcuts, so a broken thumbnail or preference file doesn’t stop it saving.
Download Sowiks for Mac